Shopify is a proven, mainstream e-commerce platform that powers millions of active stores. Big brands like Netflix and Red Bull even run their online shops on Shopify, and it holds the top spot in the US, powering about 27.35% of websites. In fact, over 2.7 million merchants use Shopify worldwide, collectively doing more than $5.5 billion in sales each year. All this means that Shopify is a trusted platform for businesses of all sizes.
Getting started is easy. You can sign up for a free trial (often a 14-day trial, or promotions like $1/month for the first 3 months) and begin building your store right away. Shopify’s dashboard is easy to understand. Even if you’ve never built an online store before, you can figure things out quickly. The layout is simple, and everything, products, orders, and customers, is clearly organised.
You also don’t need to deal with the technical setup. Shopify handles hosting, payment processing, and website performance for you. This saves time and removes a lot of stress, especially for beginners.
When you create a store, you already get the basics needed to run a secure online business. Your site comes with an SSL certificate, safe checkout, and 24/7 customer support. You can focus on selling instead of fixing technical problems.
Why Choose Shopify?
Every Shopify plan includes tools that help you run your store from the start.
- Unlimited products and bandwidth: You can add as many products as you want. Your store can handle large traffic without extra charges.
- Built-in marketing tools: Shopify helps you recover abandoned carts with automated emails. You can also create discount codes to attract customers and increase sales.
- Analytics & reports: You get real-time sales, order, and traffic analytics, plus finance reports to track your store’s performance.
- Multichannel selling: Sync your catalogue to social platforms and marketplaces, selling on social or marketplaces while managing orders in one place.
- Secure checkout: Every store has an SSL certificate and meets Level-1 PCI standards for payment security.
With Shopify handling the hard parts, you need to plug in your products and brand. The steps below show you how.
Find Your Niche and Plan Ahead
Before you log into Shopify, decide what you want to sell and who you want to sell to. Focus on a specific niche market. Instead of trying to sell to everyone, choose a clearly defined audience. This makes your marketing more focused and effective.
Use free tools like Google Trends or Keywords Everywhere to research demand and identify trending products. Look for steady interest, not just short-term hype. Write down your business idea, target market, and estimated costs. Even a simple plan helps you stay organised.
Think about your brand values, mission, and overall identity at this stage. Decide how you want customers to see your business. You should also choose your legal structure (sole proprietorship, LLC, etc.) and register any required licenses or tax IDs based on your country’s regulations.
Choosing a niche doesn’t mean tiny scale; even broad markets have sub-niches. Shopify’s guide notes that niche markets are defined by specific needs, and advises that if you enter a crowded field, “consider ‘niching down’”. For example, instead of “shoes”, you might sell “women’s trail running shoes.” Concentrating on a clear segment makes your marketing more effective and helps you stand out. Once your plan is ready, move on to building the store itself.
How Much Does It Cost to Start a Shopify Business?
One of the first things people ask is simple:
“How much money do I need to get started?”
The honest answer is, it depends. You can start small and keep costs low, or you can invest more from the beginning if you want faster growth. Here’s what you should realistically expect.
1. Shopify Plan
Shopify has different pricing plans, but most beginners choose the Basic plan.
- Free trial: Promotions change from time to time.
- Basic Plan: Around $25/month (depends on your country).
- Transaction fees: These vary based on your payment method and location.
If you start during a promotion, your first month might cost as little as $1. Otherwise, expect around $25.
2. Domain Name
Your default store URL will look like yourstore.myshopify.com. It works, but it doesn’t look very professional.
Buying a custom domain (like yourstore.com) makes your business look more serious. You can buy one directly through Shopify or from providers like GoDaddy.
Most domains cost between $10 and $20 per year. So you’re looking at roughly $15 to get started.
3. Theme (Design)
Shopify gives you free themes, and honestly, they’re good enough for most beginners. The popular free theme “Dawn” works perfectly fine.
If you want something more advanced, premium themes usually cost between $150 and $400 as a one-time payment.
If you’re just starting, a free theme is more than enough.
4. Apps & Tools
The Shopify App Store has thousands of apps. Some are free, some charge monthly fees.
Beginners usually install apps for:
- Email marketing
- Product reviews
- Upsells and cross-sells
- SEO improvements
You can absolutely start with free apps. If you choose paid tools, expect to spend somewhere between $0 and $50 per month in the beginning.
5. Marketing Budget
You don’t have to spend money on ads right away. Many new stores begin with SEO, social media, and organic traffic.
If you decide to run ads:
- Facebook Ads: $5–$20 per day
- TikTok Ads: $10–$30 per day
- Google Ads: Flexible budget
A reasonable starting ad budget would be around $150–$500 to properly test products.
What Does That Look Like in Real Life?
Lean Beginner Setup
- Shopify plan: $1–$25
- Domain: ~$15
- Free theme
- Free apps
- Organic marketing
Total: Around $50–$100
This is enough to launch and start learning.
Growth-Focused Setup
- Shopify plan: $66
- Domain: $15
- Premium theme: ~$250
- Apps: ~$30
- Ads budget: ~$300
Total: Around $650–$800
This setup gives you more tools and faster traffic.
Serious Brand Launch
- Paid Shopify plan
- Premium theme
- Paid apps
- Professional branding
- Strong ad budget
Total: $1,000 or more
You can start with under $100, but scaling requires reinvesting profits.
Create Your Shopify Store
Follow these steps to launch your Shopify store:
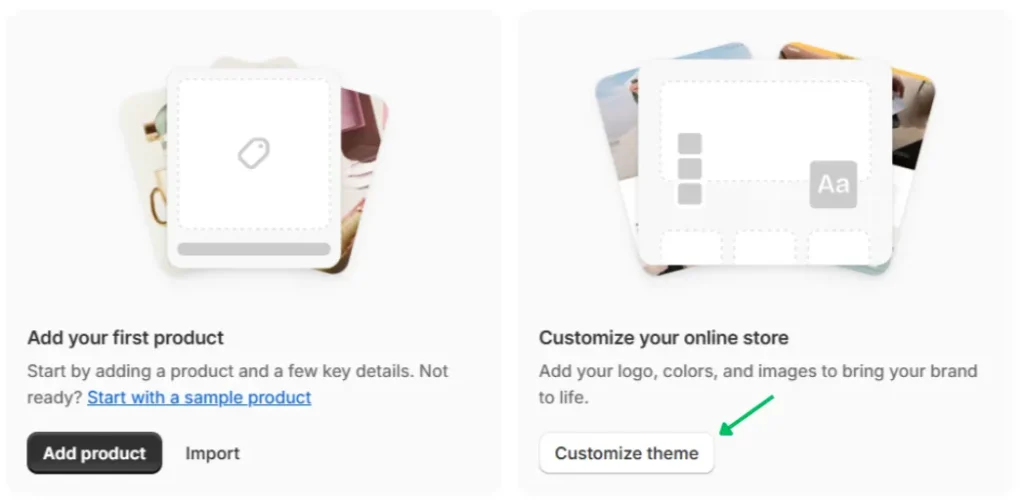
- Sign up for Shopify: Go to shopify.com and start a free trial. You’ll be asked for your email, a store name, and a password. The store name also becomes part of your initial URL (yourstorename.myshopify.com). You can change it later if you connect a custom domain.
- Pick a pricing plan: Shopify offers several pricing plans. You don’t have to choose one immediately; you can build and test your store during the free trial first. Most new stores begin with the Basic plan since it includes everything you need to launch. Occasionally, promotions reduce the price to around $1 per month for a limited time, which makes it even easier to get started. Choose a plan based on your expected sales volume and whether you’ll have team members accessing the store. The free trial gives you time to set everything up properly before committing to a paid plan.
- Set up store info: In the Shopify admin under Settings, enter your business address, currency, and other details. These determine things like the currency displayed and shipping rates.
- Store features: All Shopify plans include key features right away (no extra add-ons needed). For example, you get fraud analysis on payments, the ability to create manual orders, and built-in shipping label printing. Everything is handled through the Shopify admin panel, so you won’t need separate software for orders, products, customers, etc.
Design and Customise Your Store
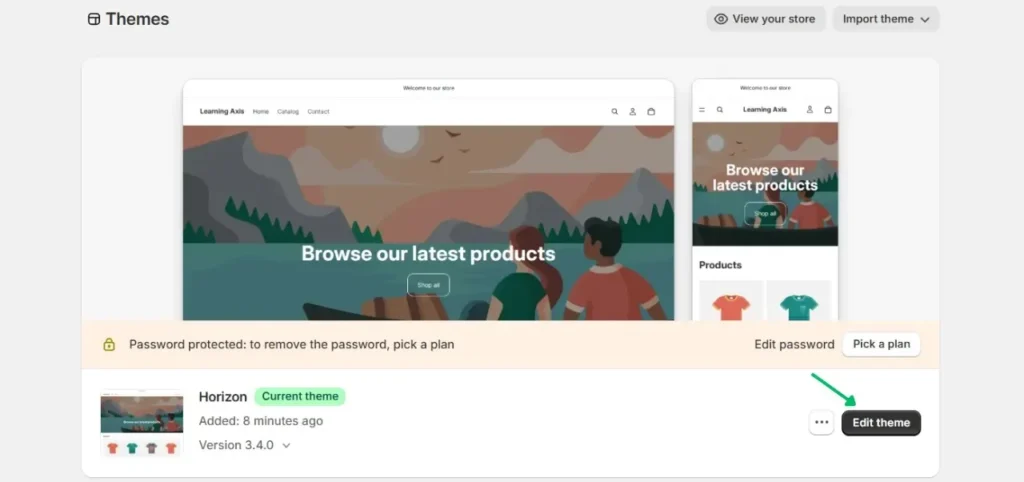
Screenshot collage of sample Shopify store designs. With your Shopify admin ready, go to Online Store > Customize Theme. A default theme (called “Horizon” or similar) is already applied.
Now you can click edit theme to edit it, or visit the Shopify Theme Store to pick a different one. Shopify offers hundreds of themes, both free and premium, with designs for every industry. Browse the free themes first to get a professional look at no cost.
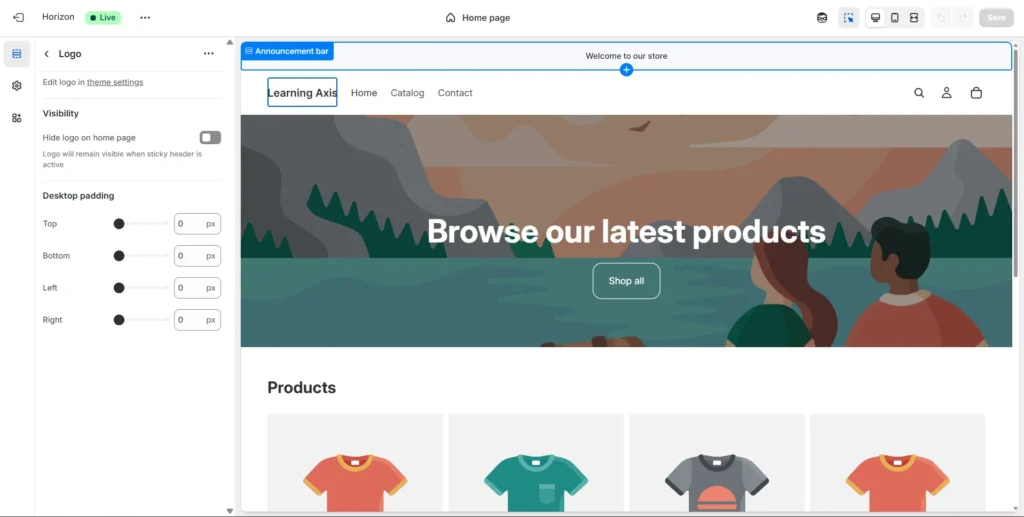
Once a theme is added, use Shopify’s drag-and-drop editor to personalise it. Add your logo, change colours and fonts, and adjust layout blocks. The editor is user-friendly, no coding required, so even beginners can build a polished site. For example, you might upload a hero banner image, place product carousels on your homepage, or show featured collections.
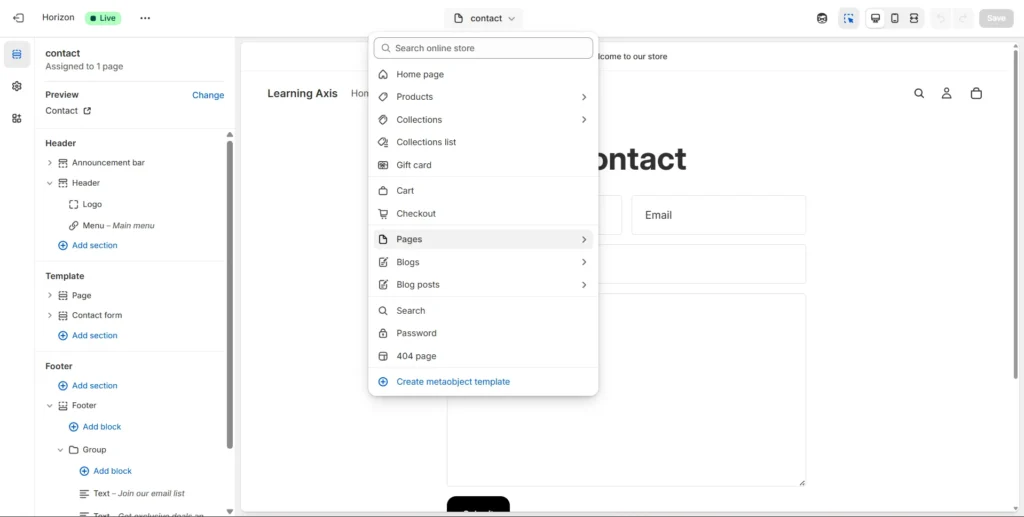
Be sure to set up easy navigation so shoppers can find products. Under Online Store > Navigation, create menus (main menu, footer menu, etc.) by linking to your collection or page URLs. For instance, you could add a link “Shop All Products” to your products page. Shopify even supports nested (drop-down) menus if you have many categories.
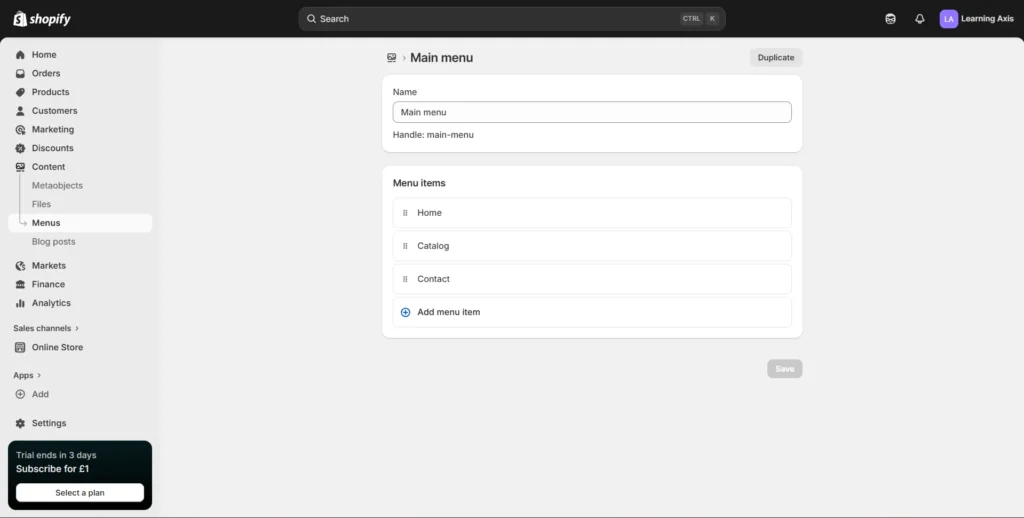
Add essential pages too. Most stores include “About Us,” “Contact,” “FAQ,” or “Blog” pages. In Online Store > Pages, click Add page to create each one. Give each page a clear title and fill in content (this is also good for SEO, more on that below). These pages will usually link from your footer menu.
Remember: your store’s visual style should match your brand. Use consistent colours, professional photos, and your logo. If you don’t have a logo yet, Shopify even offers a simple logo maker for entrepreneurs. The goal is a cohesive look so customers trust your site.
Add Products and Content
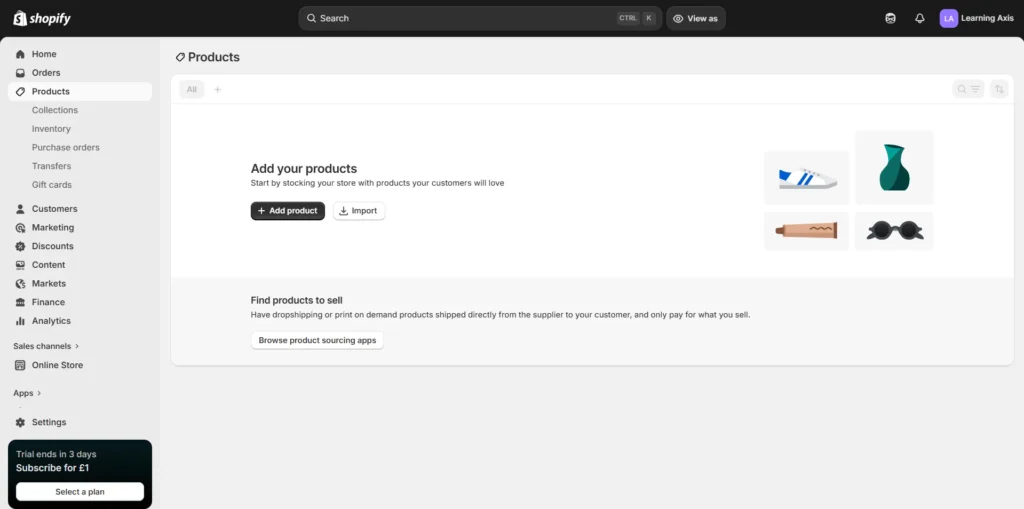
Now it’s time to populate your store with what you sell. Shopify imposes no limit on product count, so feel free to list as many items as you want.
Add products: In the Shopify admin, go to Products > Add product. Enter a product title, detailed description, and price. Upload high-quality images (you can add multiple photos per product). Use clear, keyword-rich text so shoppers and search engines understand the product. For example, instead of just “Black T-Shirt,” describe it fully: “Men’s Black Cotton T-Shirt, sizes S-XL.”
OrganizeOrganize with collections and tags: As you add products, group them into collections (categories). For instance, you might create collections like “New Arrivals,” “Gifts Under $50,” or “Women’s Shoes.” Shopify lets customers browse by collection. Also, add tags to each product (e.g. “red”, “handmade”, “outdoor”). Tags are useful for filtering products or linking them in menus.
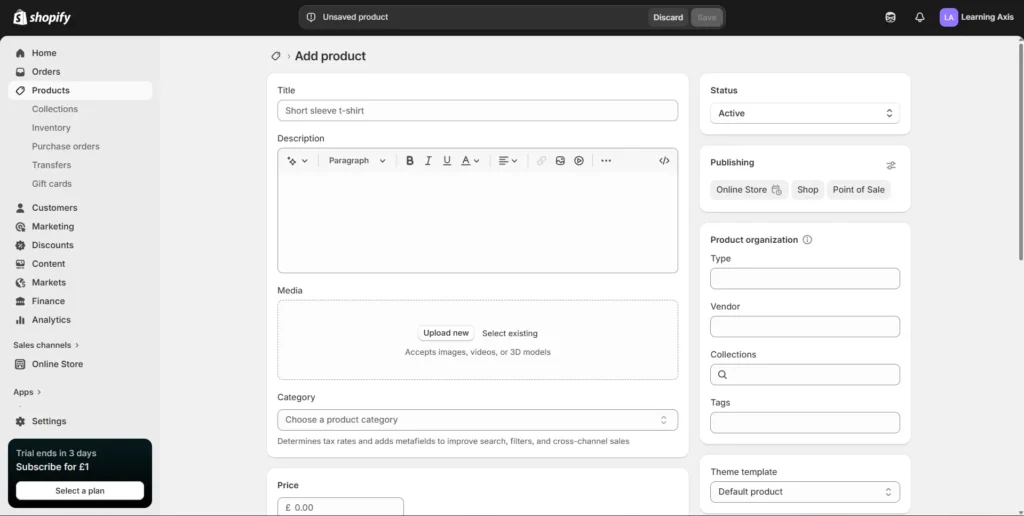
SEO for products: Shopify gives you control over SEO (search engine optimisation) for each product. At the bottom of the product page editor is the Search engine listing preview. Click Edit website SEO to set a custom title and description. Write these using keywords your customers might search. Good SEO titles (in 50-60 characters) and meta descriptions (in 150-160 characters) help your products rank in Google. Also, fill in the Alt Text for each product image (briefly describe the image using keywords). Descriptive alt text improves accessibility and image SEO.
Other content: Don’t ignore your store pages like “About Us” and “Policies.” Customers often check these before buying, so keep the information clear and helpful.
Try to explain who you are, what you sell, and how your store works. Use simple language and include relevant keywords where they make sense.
You can also start a blog inside your Shopify store to bring in more visitors. Write helpful posts related to your products. For example, if you sell yoga gear, you could share beginner yoga tips or simple wellness advice.
Good content helps people trust your store. It also improves your SEO and keeps visitors on your site longer.
Configure Payments, Shipping, Taxes, and Domain
Once your products are added, it’s time to handle the practical setup before launching.
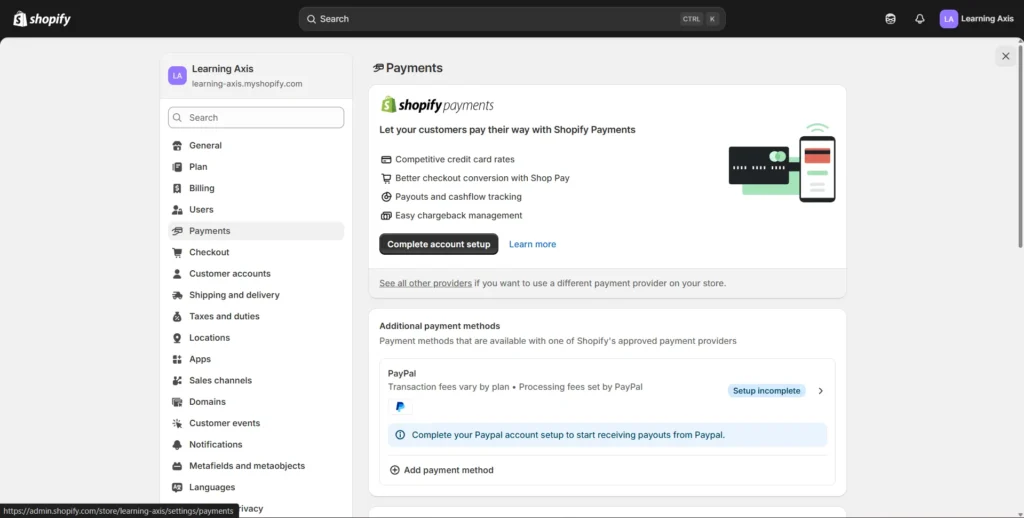
Payments
Go to Settings > Payments to decide how you’ll accept money.
Most beginners use Shopify Payments because it’s built in. You just enter your business and bank details, and it takes care of credit card processing.
You can also enable other payment options, like:
- PayPal
- Amazon Pay
- Apple Pay
The more payment options you offer, the better. Some customers will leave if they don’t see their preferred method, so it’s worth enabling the popular ones.
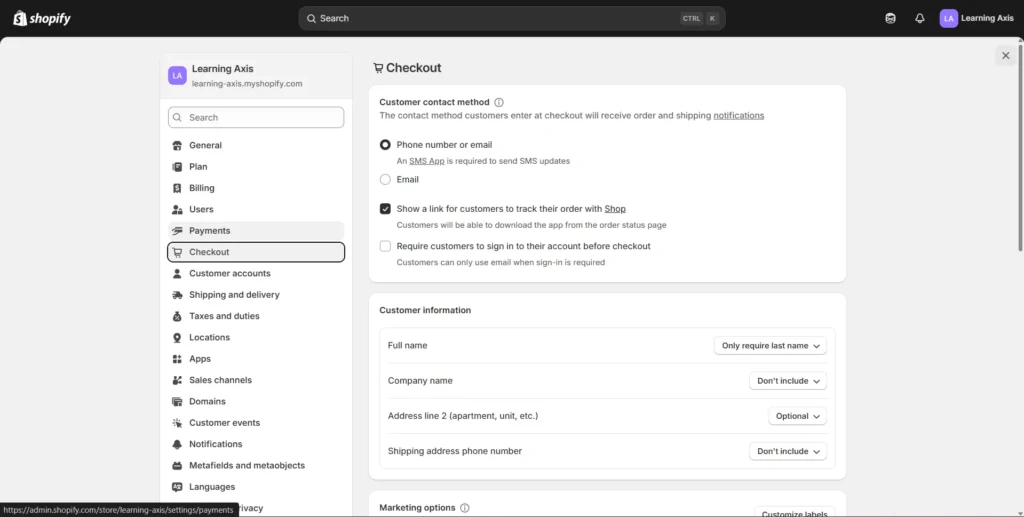
Checkout Settings
In the Payments section, you can also adjust checkout settings — things like customer accounts, order confirmation emails, and security options.
Make sure to enable two-step authentication on your admin account for extra protection.
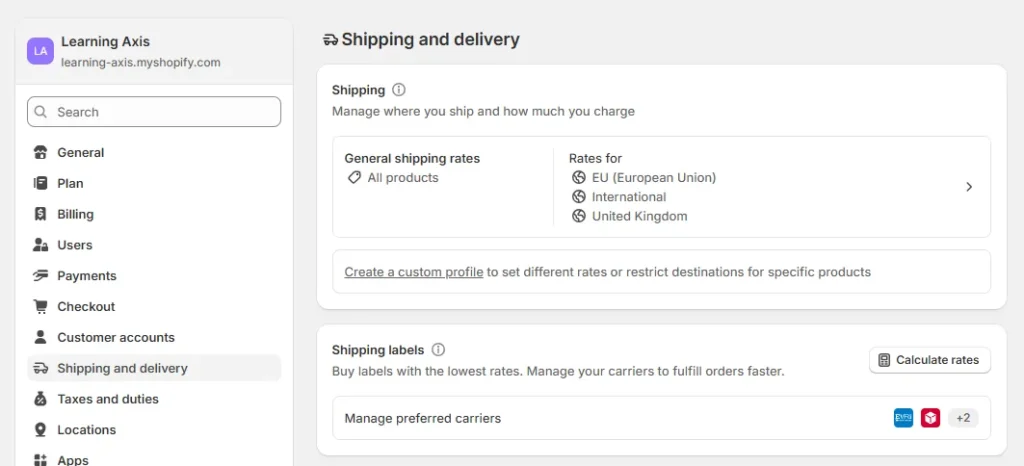
Shipping
Go to Settings > Shipping and Delivery.
Here, you define:
- Shipping zones (where you ship)
- Shipping rates (how much you charge)
For example:
- Flat-rate shipping ($5 nationwide)
- Free shipping over $50
- International shipping with different rates
If you want customers to see live carrier pricing, Shopify supports real-time rates from carriers like United States Postal Service and United Parcel Service.
On paid plans, you can even buy discounted USPS shipping labels directly from your dashboard.
Take a few minutes to review this carefully. Clear shipping rules prevent confusion and abandoned carts.
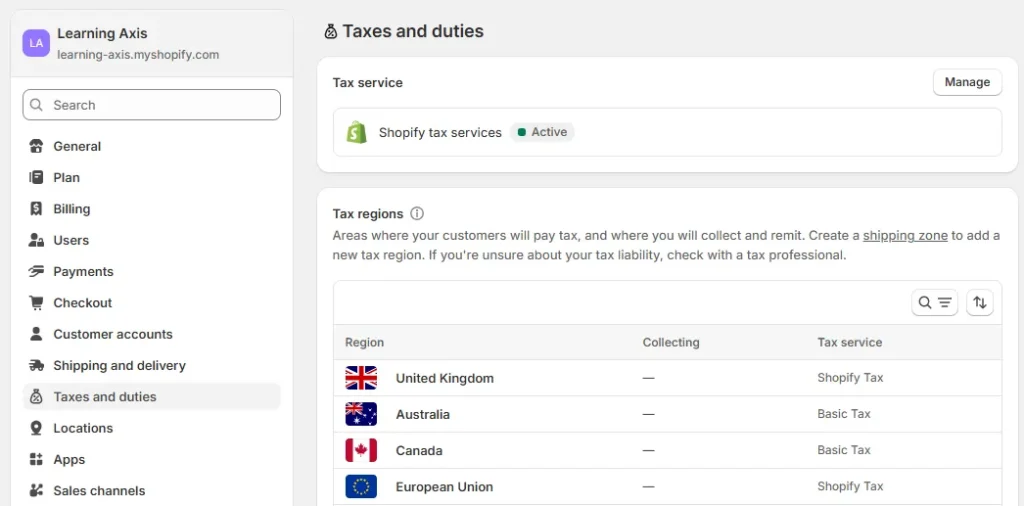
Taxes
Under Settings > Taxes, set up how you collect sales tax.
Depending on where you live (US, EU, Canada, etc.), you may need a tax ID or VAT number. Shopify can automatically calculate taxes in many regions, but it’s still your responsibility to make sure you’re compliant with local laws.
Enter your tax registration details so the correct amount is added at checkout.
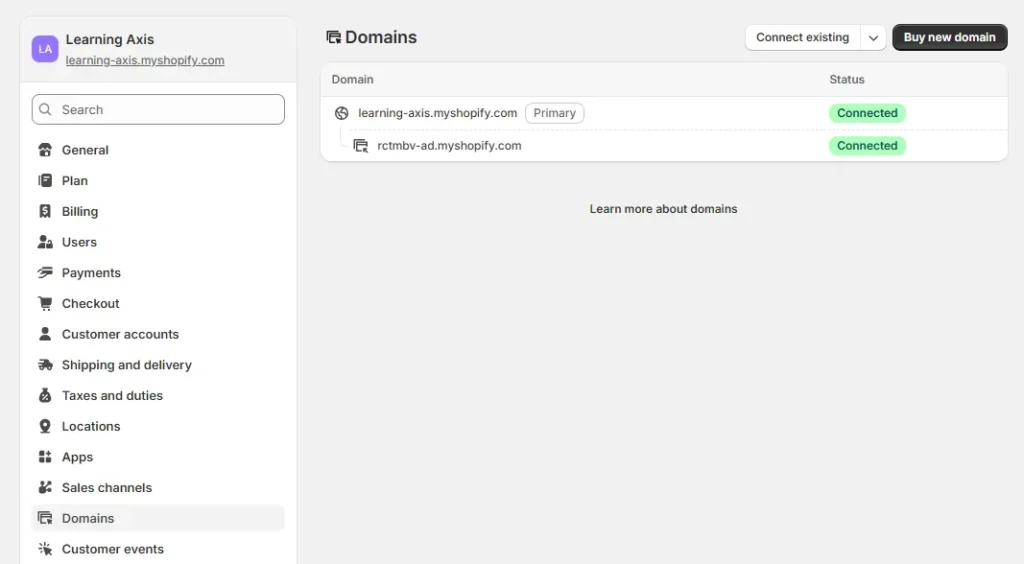
Domain Name
By default, your store URL looks like yourstore.myshopify.com. It works, but it doesn’t look very professional.
Buying a custom domain (like yourstore.com) makes your business look more legitimate. You can purchase one directly inside Shopify or connect one from providers like GoDaddy.
After connecting, DNS updates can take up to 48 hours. Once it’s active, your store will use the new address. A short, easy-to-remember domain helps customers trust you and come back later.
Test and Launch Your Store
Before going live, test everything. Add a product to your cart and go through checkout yourself. See exactly what customers will see.
Shopify allows test orders:
- Go to Settings > Payments
- Enable Test mode
- Complete a sample checkout using test payment details
After placing the test order, check your Orders section to confirm everything works correctly.
New stores are password-protected while you’re building them. When you’re ready to launch:
- Go to Online Store > Preferences
- Turn off password protection
- Save changes
That’s it, your store is officially live.
Promote and Grow Your Store
Launching is exciting, but traffic is what brings sales. Here are practical ways to grow.
Optimise for Search (SEO)
People searching on Google often have buying intent.
Use clear keywords in:
- Product titles
- Page titles
- Descriptions
Write naturally, don’t stuff keywords.
Add descriptive alt text to images. Make sure your pages load quickly. Consider writing helpful blog posts related to your niche to bring in organic traffic.
Content Marketing
One of the easiest ways to build trust is by creating useful content around what you sell.
If you sell fitness gear, write simple workout guides or beginner routines.
If you sell kitchen tools, share recipes people can actually try at home.
The goal isn’t to constantly push your products. It’s to help people. When your content is genuinely useful, customers are much more likely to buy from you. Share your posts on social media and naturally mention your products where they make sense.
Social Media
Pick one or two platforms and focus on those. For most stores, that’s:
- TikTok
Post consistently. That could be product photos, packing orders, behind-the-scenes clips, or customer reviews. Short videos usually perform better than static images.
Reply to comments. Talk to your audience. Ask questions. Encourage customers to tag you when they receive their order. You can also work with smaller influencers in your niche; they’re often more affordable and have highly engaged followers.
Email Marketing
Start collecting emails from day one. Even if traffic is low, it adds up over time.
Offer something small in exchange:
- A discount
- Free shipping
- A simple guide related to your product
Send occasional updates, new product launches, or special offers. Set up abandoned cart emails too; those alone can recover sales you would’ve lost.
Promotions and Discounts
Discounts work, especially when used strategically.
You can try:
- First-time buyer codes
- Free shipping over a certain amount
- Limited-time offers
When people feel like they might miss out, they’re more likely to complete their purchase. Just don’t overdo it, or customers will start waiting for discounts instead of buying at full price.
Multi-Channel Sales
Your website doesn’t have to be your only sales channel. With Shopify, you can also sell on the Amazon marketplace or directly through social media shops. If you sell in person, at markets or pop-ups, Shopify’s POS system keeps everything synced so your inventory stays accurate. It’s all managed from one dashboard, which makes things much easier.
Influencers and Affiliates
Working with creators in your niche can help you reach new audiences quickly. Influencers introduce your product to their followers. Affiliates promote your product and earn a commission only when they generate a sale. That makes it lower risk since you’re paying for results, not just exposure.
Analyze and Improve
Inside your Shopify dashboard, you’ll see what’s actually happening in your store, which products are selling, where visitors are coming from, and how well your site converts. You can also connect Google Analytics if you want more detailed insights. Check your numbers regularly. Small tweaks, better product photos, clearer descriptions, and adjusting pricing can have a big impact over time.
Common Beginner Mistakes to Avoid
- Picking a niche that’s too broad
- Not researching whether people actually want the product
- Paying for too many apps before making sales
- Writing weak product descriptions
- Using low-quality images
- Forgetting to test the checkout process
- Inconsistent branding
- Expecting fast results without consistent marketing
Frequently Asked Questions
1. Is Shopify good for beginners?
Yes. Shopify takes care of hosting, security, and payments, so you don’t need technical skills. It’s designed to be straightforward to manage.
2. How long does it take to make money?
It depends. Some people make sales quickly. Others take weeks or months. In most cases, success comes down to product choice and marketing effort, not the platform.
3. Can I start with no money?
You can use the free trial to build your store, but you’ll need at least enough to pay for the plan and a domain once you launch. Starting with around $50–$100 is realistic if you keep expenses low.
4. Do I need an LLC?
No. Many people start as sole proprietors. As your store grows, you can decide whether forming a legal entity makes sense for tax or liability reasons.
5. Is Shopify better than WooCommerce?
WooCommerce gives you more customisation but requires more setup and technical work. Shopify is simpler because everything is hosted and managed for you.
6. What can I sell?
You can sell physical products, digital downloads, print-on-demand items, subscriptions, services, and more, as long as they follow Shopify’s policies.
Conclusion
Starting an online business is more accessible than ever. With Shopify handling the technical side, hosting, payments, and security, you can focus on your products and customers.
It won’t become successful overnight, but with consistent effort, testing, and smart marketing, you can build something real.
Plenty of entrepreneurs started with a simple store and grew from there. There’s no reason you can’t do the same.